

The short answer (updated October 2026):
- To record yourself, open QuickTime Player, choose File > New Movie Recording and click Record. Photo Booth's Video button does the same with fewer settings.
- To record your screen, press Shift-Command-5 and pick a microphone under Options so your voice is in it. On macOS 27, Include System Audio records the Mac's own sound too.
- For your face and your screen together, the usual trick is a QuickTime movie recording set to View > Float on Top, with the screen recorded around it.
- Every built-in method saves a .mov file you can trim. Apple's Presenter Overlay puts you on a shared screen, but only in video calls.
- Raise the laptop to eye level and face a window. An iPhone XR or later can be your webcam through Continuity Camera.
You want a video of yourself from your Mac: a welcome for your course, a hello for your booking page, a walkthrough of your slides. You don't need to install anything. QuickTime Player records your camera, Photo Booth makes a quick clip, and Shift-Command-5 records your screen. For your face and screen together, keep QuickTime's camera window on top while the screen records. The steps for each are below, checked against Apple Support for macOS 27, along with the setup that makes a MacBook camera look good.
Four built-in ways to record yourself on a Mac, compared
Pick the method by what has to be in the shot. Photo Booth and QuickTime Player record your camera. The Screenshot toolbar records your screen. QuickTime's camera window, kept on top of a screen recording, gets you both. Presenter Overlay looks like the answer to the last one, but Apple documents it for screen sharing in video calls, not for recording.
| Method | Your camera | Your screen | You on your screen | Editing built in | Saves as | Source |
|---|---|---|---|---|---|---|
| Photo Booth, Video button | Yes | No | No | Trim | MOV, through File > Export | Record, edit, export |
| QuickTime Player, File > New Movie Recording | Yes, with a choice of camera, mic and quality | No | No | Trim, split, rearrange clips | .mov, exported at 4K, 1080p, 720p or 480p | Record, split, export |
| Screenshot toolbar, Shift-Command-5 | No | Yes: the whole screen, one window (macOS Tahoe 26 or later) or a portion | No | Trim, from the thumbnail | .mov, on the desktop by default | Apple Support 102618 |
| QuickTime camera window on top, plus Shift-Command-5 | Yes | Yes | Yes, fixed where you leave the window | Trim | .mov | Float on Top, MacRumors tip |
| Presenter Overlay | Yes | Yes, while sharing it | Yes, during a video call in an app that supports it | None | Not a recorder | Mac User Guide |
Checked against Apple Support on October 12, 2026, for macOS 27 Golden Gate. None of these makes an MP4. QuickTime Player doesn't export MP4 at all, only .mov.
Record yourself with QuickTime Player in five steps
QuickTime Player is the best built-in choice for a talking-head video, because it lets you pick the camera, the microphone and the quality. Photo Booth's guide mentions no mic or quality setting at all. A clean take is five steps:
- Open QuickTime Player and choose File > New Movie Recording. A green light next to the camera shows it is on.
- Click the small arrow next to the Record button. Choose your camera and microphone if you have more than one.
- Set Quality to High, which records H.264 video with AAC audio. Maximum records Apple ProRes 422, and those files "can use large amounts of storage space."
- Click Record. To pause, Option-click the Record button. Click it again to resume.
- Click Stop, then choose File > Save and name the file.
Now clean up the ends. Choose Edit > Trim and drag the yellow handles past the part where you reach for the mouse. Fluffed a sentence in the middle? Split the movie into clips with Edit > Split Clip, delete the bad one, and save. That is about as far as QuickTime's editing goes. File > Export As saves a copy at 4K, 1080p, 720p or 480p.
Leave Quality on High for anything going to social media. Maximum makes huge files, and social platforms re-encode what you upload anyway. Keep Maximum for footage you plan to color-correct in a full editor.
Photo Booth records a quick clip with one button
Photo Booth is the fastest way to record yourself. There is almost nothing to set:
- Open Photo Booth. If it shows an old photo or video, click the View Photo or View Video button to get back to the camera.
- Click the Video button at the bottom left.
- Click the Record Video button. Option-click it to skip the countdown.
- Click Stop when you finish.
To cut the ends, play the clip and choose Edit > Trim Movie, then drag the yellow markers. To get the file out, select the thumbnail and choose File > Export, which saves a MOV. Dragging the thumbnail to your desktop works too.
Use Photo Booth for a 30-second hello or a quick video reply to a client. For anything longer, or anything you will edit, open QuickTime. Its mic menu and split tool earn their place by the second take.
Press Shift-Command-5 to record your screen
Apple's Screenshot toolbar records the whole screen, one window or a part of it. Your voice is in it only if you pick a microphone first:
- Press Shift-Command-5.
- Choose Record Entire Screen, Record Selected Window or Record Selected Portion. Selected Window needs macOS Tahoe 26 or later.
- Click Options and choose a microphone. Skip this and your voice isn't in the recording.
- Click Record. If you chose a window, click that window.
- To stop, click the Stop button in the menu bar or press Command-Control-Esc.
The sound playing on your Mac is the new part. Apple lists an Include System Audio option for macOS 27 Golden Gate or later, so the sound of a YouTube clip or a software demo can be in the recording. Guides written before this fall still say a Mac can't record its own sound without extra software. On macOS Tahoe 26 or older, that is still true.
By default the file lands on your desktop, named "Screen Recording" with the date and time. To trim it first, click the thumbnail that appears in the corner. Options also has Show Mouse Clicks, a countdown timer and a "Save to" folder. Supported Macs on macOS Tahoe 26 or later also get a capture format. Choose SDR (Most Compatible), which records H.264. HDR records HEVC and needs an HDR display to see the difference. SDR is the standard for most computer displays and phones.
QuickTime's File > New Screen Recording, or Control-Command-N, usually opens this same toolbar. When it does, Apple says the Screenshot app is doing the recording, so the steps are the same.
Show your face on a screen recording by floating QuickTime's camera window
Apple's screen recorder has no camera setting. The workaround Mac users pass around is to park QuickTime's camera window on the screen and record around it:
- In QuickTime Player, choose File > New Movie Recording. Don't press its Record button. This window is your camera bubble.
- Choose View > Float on Top, so the window stays in front of everything else.
- Drag the window into a corner and drag its edge to shrink it. Turn its volume slider all the way down so your voice doesn't play through the speakers.
- Press Shift-Command-5, choose Record Entire Screen, and pick your microphone under Options.
- Click Record and present. Press Command-Control-Esc to stop.
Treat this as a tip, not an Apple feature. Apple's guide describes Float on Top for a video you're playing. Using it on the camera preview comes from Mac users, like this MacRumors forum answer from 2021. The floating window then gets recorded like any other window.
The catch: your face is baked into the picture. You can't move it later, and it covers whatever sits behind it. Say a hypothetical business coach is walking a client through a proposal. Park the bubble bottom right and keep the proposal's numbers out of that corner.
Presenter Overlay is Apple's polished version of the idea, and it lives in video calls. It needs macOS Sonoma 14 or later, plus a Mac with Apple silicon or an iPhone 12 or later as the webcam. You share your screen in a call and choose Small or Large. Small puts you in a movable bubble. Large puts you up front with the screen beside you. If the option is missing, the app you're in doesn't support it.
In CreateSocial's recording studio, this is one step. On a Mac, open it in Chrome or Edge, not Safari. Share your screen, a window or a browser tab, and your camera appears as a bubble you can drag anywhere and resize by its corner. A browser needs your Mac's permission to record the screen. If sharing fails, turn your browser on under Privacy & Security > Screen & System Audio Recording in System Settings.
Set up the MacBook before you press record
Most MacBook video looks bad for two reasons. The camera films up from the desk, and the window is behind you. Both cost nothing to fix. Then check the mic.
Raise the camera to eye level
Put the laptop on a stack of books or a stand until the camera is level with your eyes. Flat on a desk, it films up your nose. Read from something right under the camera, too. The gap between your notes and the lens is how far your eyes drop, and our teleprompter explainer works out how small that gap needs to be.
Face the light
Sit facing a window, never with one behind you. Apple's camera guide gives the same advice, and adds one most people skip: wipe the lens with a soft, lint-free cloth. While an app is using the camera, the Video menu in the menu bar adds more. Studio Light dims the background and lights your face, and Portrait blurs the background. Both work on Macs with Apple silicon. Edge Light turns the display into a light for a dim room, on Apple silicon with macOS 26.2 or later.
Set the mic
The built-in mics are better than people expect. The current MacBook Air and MacBook Pro have three of them, with directional beamforming. In apps that support Mic Modes, the same Video menu offers Voice Isolation, which filters out background sound. The room still counts most. A small room with a rug and curtains beats a big bare one, as how to look natural on camera explains.
Try your iPhone as the webcam before you buy one
Buy a webcam last. A current MacBook Air or MacBook Pro already has a 12MP Center Stage camera that records 1080p HD video. Light changes the picture more than a new camera does. And if you own an iPhone XR or later, Continuity Camera makes its rear camera your Mac's webcam, wired or wireless. An older phone won't show up, so start with Apple's requirements:
- You need an iPhone XR or later on iOS 16 or later, macOS Ventura 13 or later, and both signed in to the same Apple Account with two-factor authentication, with Wi-Fi and Bluetooth on.
- On the iPhone, go to Settings > General > AirPlay & Continuity and make sure Continuity Camera is on. It is on by default.
- Mount the iPhone near the Mac, locked and steady, with the rear cameras facing you. Turned sideways, apps can pick it automatically.
- In QuickTime, Photo Booth or another app that lets you choose a camera, pick the iPhone. Apple says many third-party apps work with it too.
Plug the iPhone into the Mac to keep it charged. On an older Intel Mac, the iPhone also brings effects the Mac lacks. Portrait needs an iPhone XR or later, Center Stage an iPhone 11 or later, and Studio Light an iPhone 12 or later.
So spend in this order: a window or a lamp, a stand, your iPhone, then a webcam if you still want one. Sort the first two and the built-in camera may be all you need.
Built-in apps record the take and leave the rest to you
Every method above ends with a .mov file and a trim tool. For a one-off video, that is plenty. For a video you post every week, the work around the recording is what eats the afternoon.
Nothing built in shows your script, so you read from notes and your eyes drop. A stumble means starting over or splitting around it in QuickTime. The MacBook camera records a wide picture, while Reels, TikTok and Shorts are vertical, so the crop comes later. Subtitles and cutting the pauses happen in another app entirely. How to edit talking-head videos faster covers that part of the job.
CreateSocial does those steps in a Chrome or Edge tab. The teleprompter sits right above your camera preview, scrolled by hand or at a speed you set. You record in sections, so a fumble costs one section, not the whole take. Dual mode frames 16:9 and 9:16 at once. Already recorded in QuickTime? Upload the MOV, up to 2GB, and CreateSocial processes it like a studio recording, ready to edit by its transcript.
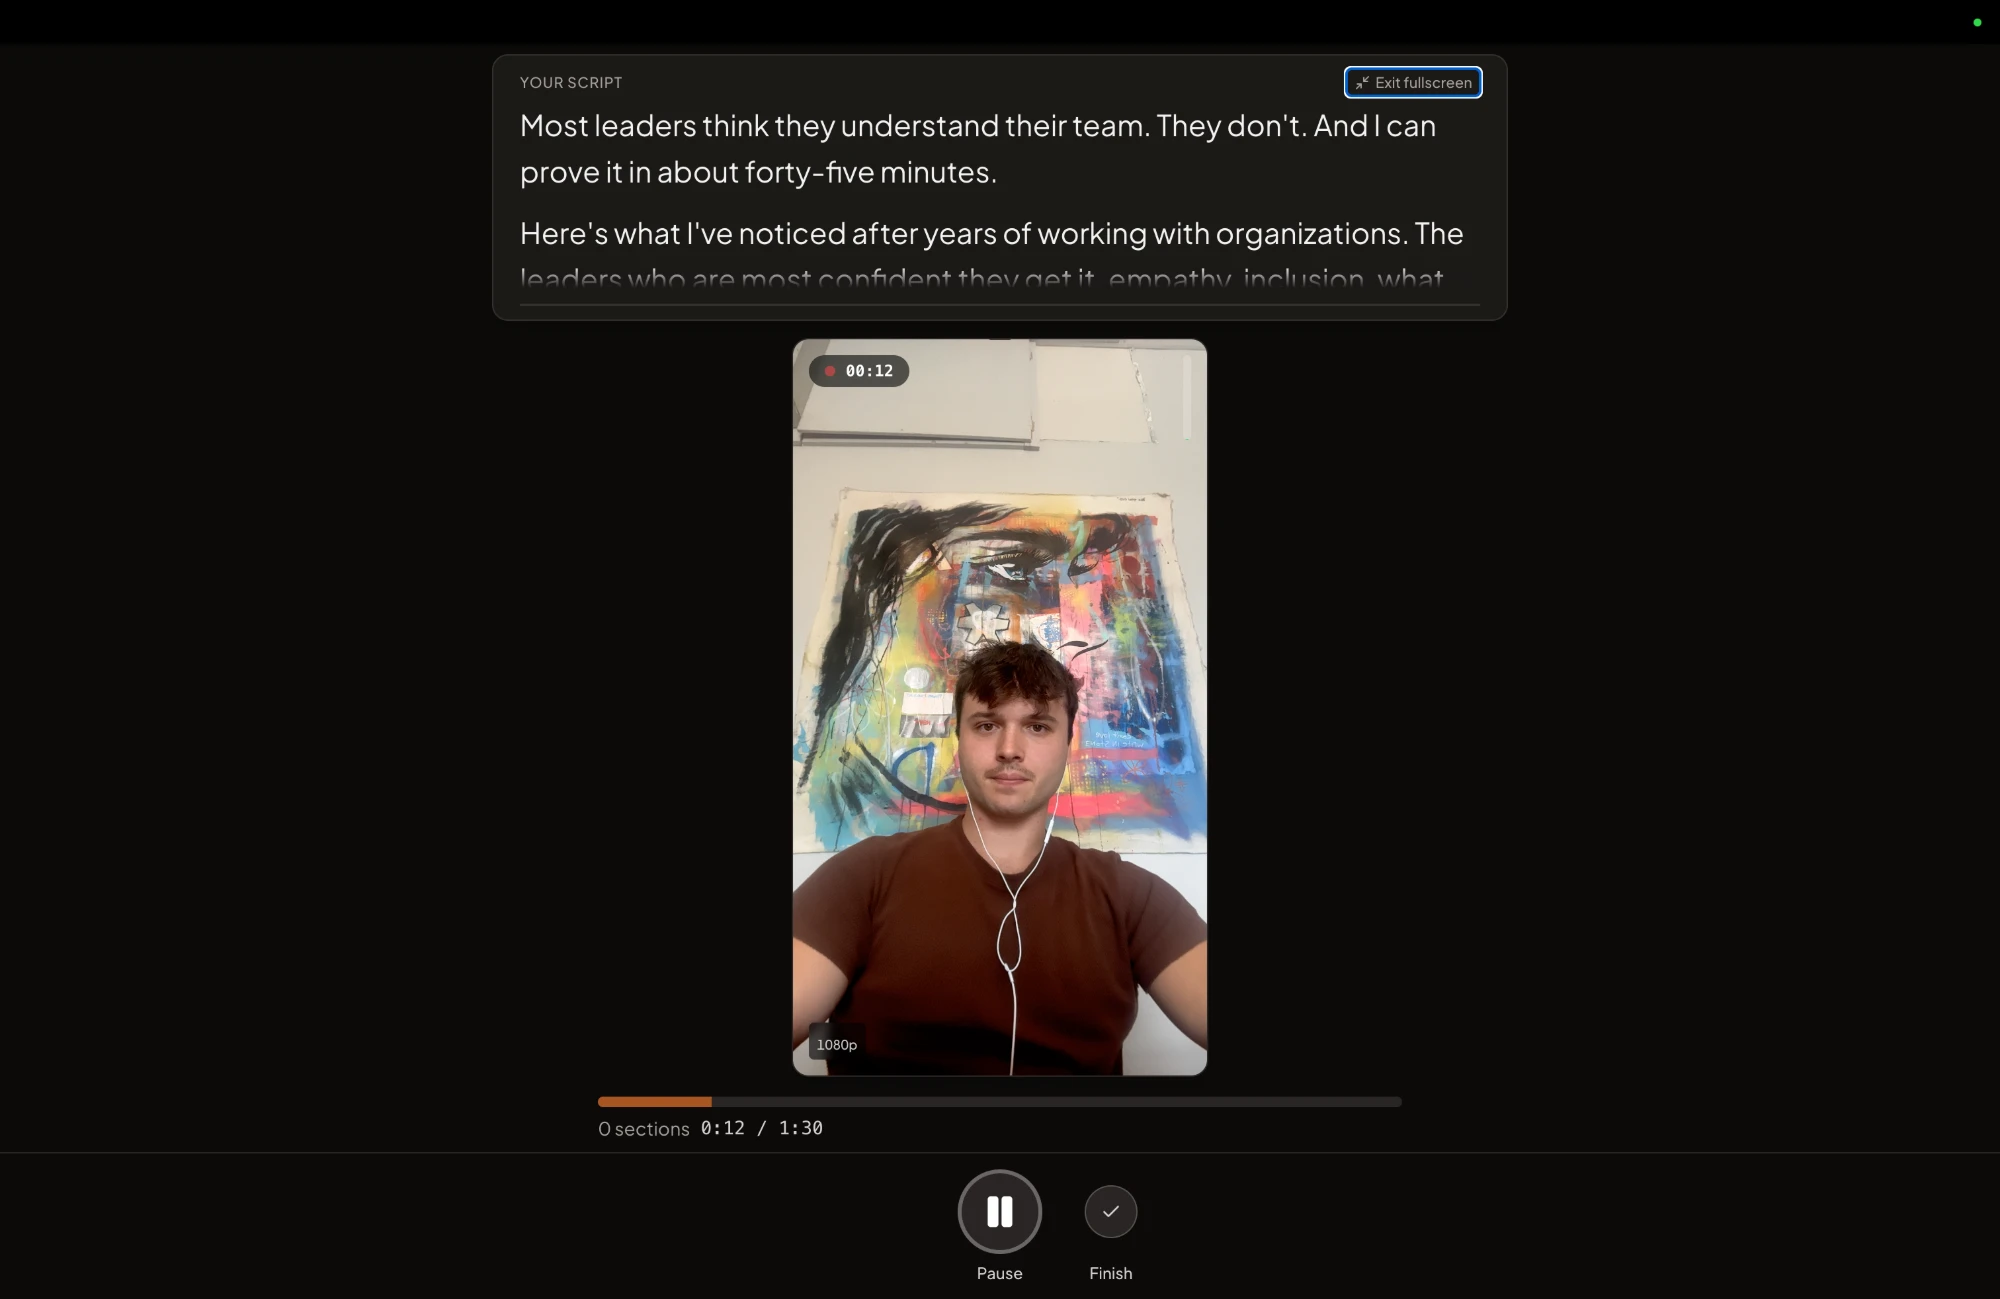
How CreateSocial records you on a Mac and runs the rest of your content week
CreateSocial helps coaches, consultants and founders build a personal brand that brings in clients, speaking gigs and customers, without content swallowing the week. It learns what you know, then runs the whole content week with you, video and written: ideas, scripts, posts, recording, editing, thumbnails and scheduling. On a Mac, use Chrome or Edge. Safari isn't supported, and there is nothing to install.
- Know what to say before the camera is on. Add your website, past videos and posts, and client stories to your knowledge base. CreateSocial turns them into 80 personalized ideas a month, each with a hook and talking points or a full script. "Ask me first" asks you a few questions before it writes, so the script tells your real story. Trending Now adds what your niche is talking about every Monday.
- Read without looking away. The teleprompter shows the full script or your talking points, with the current point highlighted. Each answer is its own section with a one-tap retake, so nobody sees the third attempt.
- Get your face and your screen in one take. Screen recording puts your camera in a bubble you drag and resize, with no floating windows to manage. Virtual backgrounds swap what's behind you, with or without a real green screen.
- Frame once for every platform. Dual mode shows the 16:9 frame and the 9:16 crop together, so one take works for YouTube and for Reels, TikTok and Shorts.
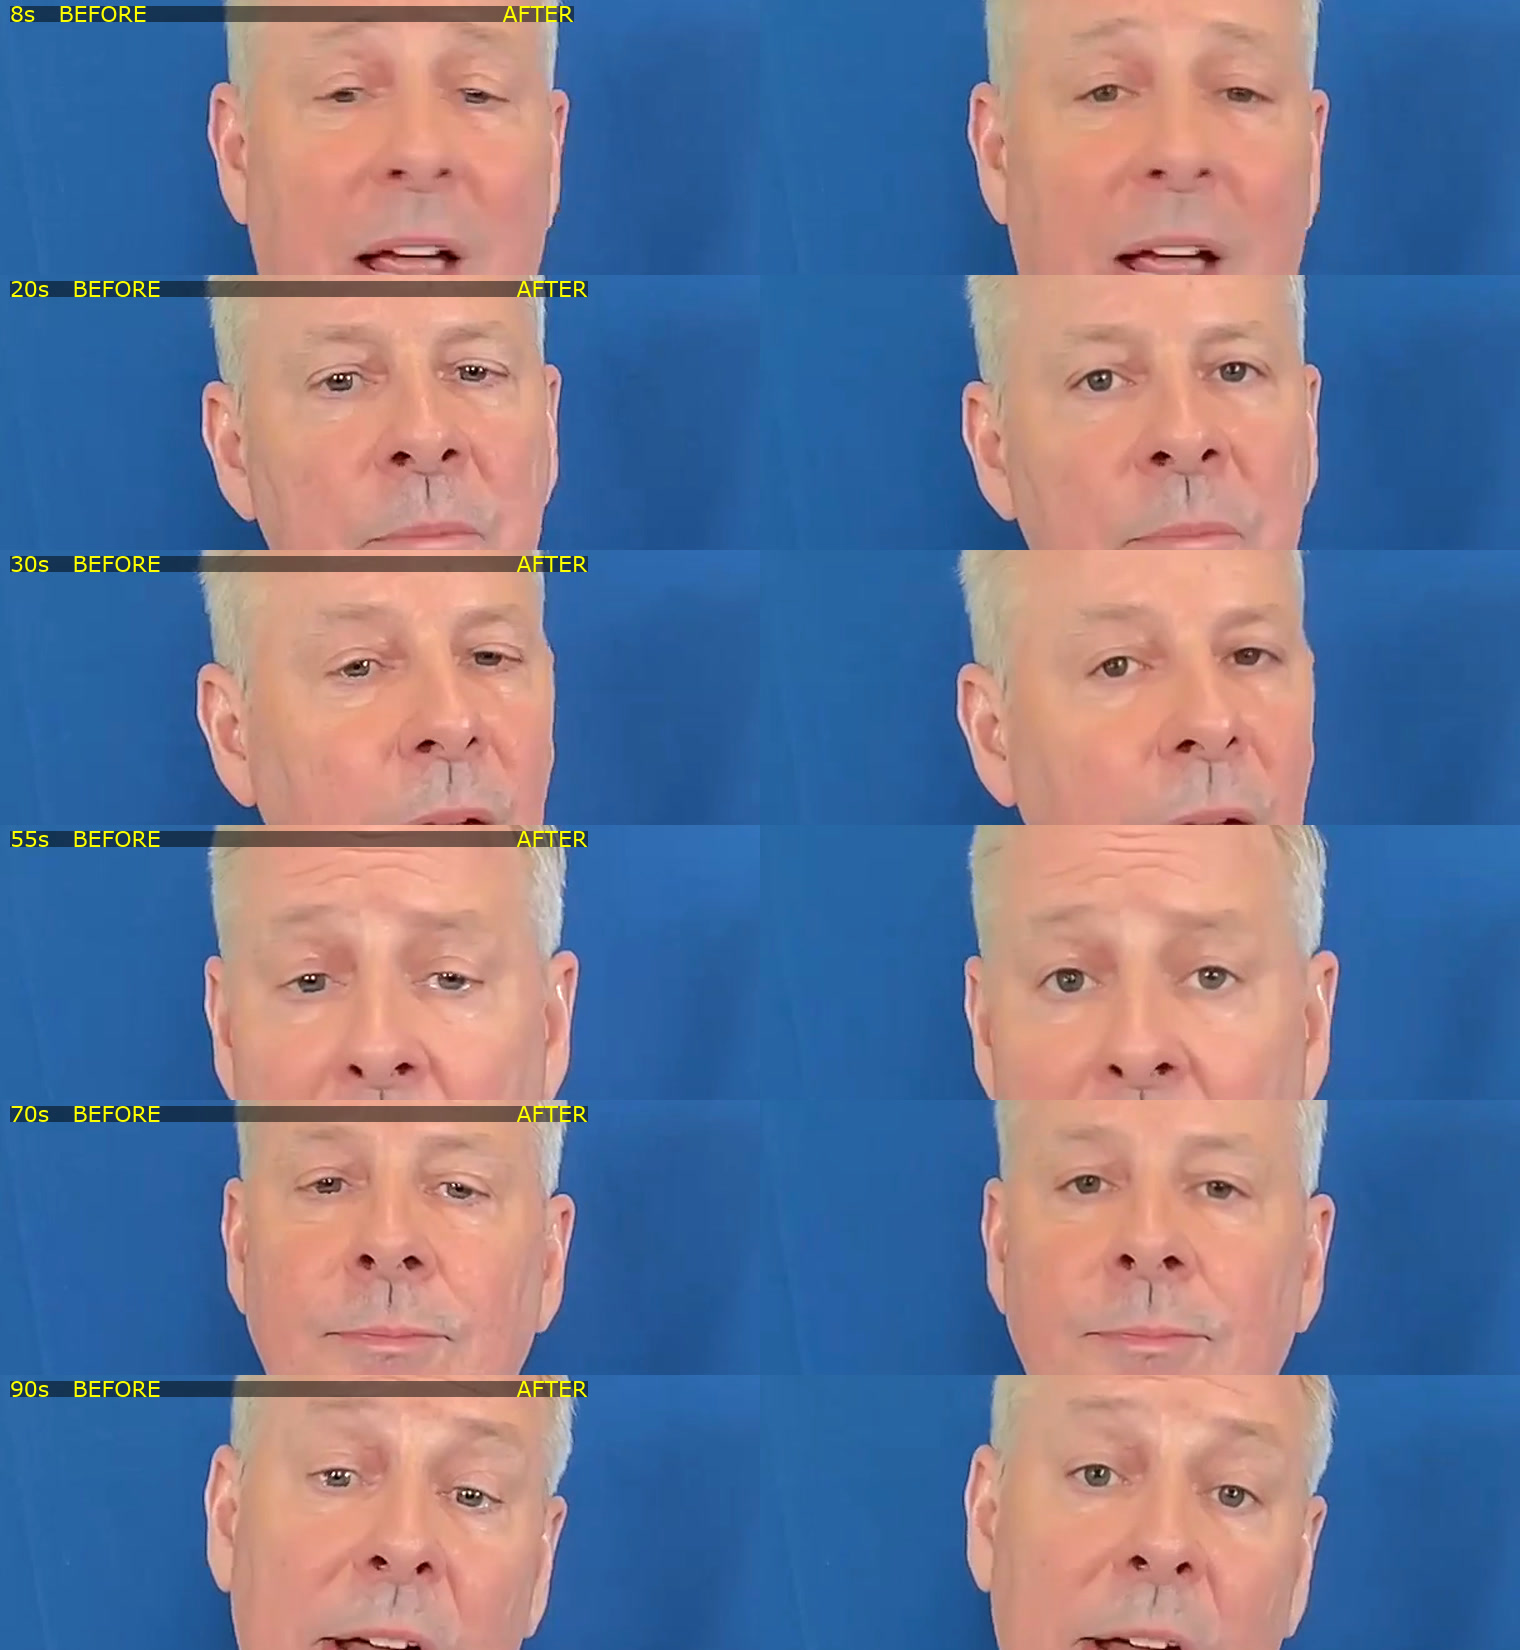
- Finish it in the same browser. Cut by deleting words from the transcript. Remove Silences takes out the pauses in one click. Eye contact correction fixes the glances down at your notes. Add subtitles in 11 styles, B-roll from free stock video search, and check placement against platform safe-zone guides.
- Send the week out from one calendar. Make YouTube thumbnails from your video and photos of you, then schedule to TikTok, Instagram, YouTube, LinkedIn, Facebook and X, each with a caption written for that platform.
Also in the one plan: competitor tracking that brings in new posts from the profiles you follow each week, written posts with no video (LinkedIn posts, X threads, blog posts and emails to your list), LinkedIn carousels with PDF and PNG export, the iPhone app for recording away from the desk, reaction videos in Layout or Stitch mode, and Find Clips, which pulls standalone clips out of a recorded webinar or any library video of 8 minutes or longer.
CreateSocial is bootstrapped by a solo founder, Ben Moore, in Cincinnati, Ohio, so you talk to him directly. Feature requests go to him, and a lot of what customers ask for gets built. Before CreateSocial, Ben's agency generated millions of followers and millions of dollars in revenue for its clients, and he has generated hundreds of millions of views.
It costs $129 a month, or $99 a month billed annually, with no add-ons and no per-feature charges. Start your free trial and record your first take with the script above your camera, in Chrome on your Mac, today. Want help deciding what to record first? Book a free strategy call with Ben.
Record your first take in the next ten minutes
- Put the MacBook on books until the camera is level with your eyes, and turn to face a window.
- Open QuickTime Player, choose File > New Movie Recording, and set Quality to High.
- Answer the question clients ask you most, in about a minute. Don't stop to restart.
- Watch it once. Check three things: the light on your face, the sound of your voice and where your eyes go.
- Need your slides in it? Float the window on top and press Shift-Command-5.
If the first take shows you're reading, that is the script's fault, not yours. How to write a video script fixes the words. A free CreateSocial trial puts them right above your camera for the next take.
Questions people ask
Can QuickTime record my screen with audio?
Yes. On recent macOS, File > New Screen Recording opens the Screenshot toolbar, where Options lets you pick a microphone for your voice. The sound playing on the Mac itself needs Include System Audio, which Apple lists only for macOS 27 Golden Gate or later.
How do I record myself and my screen at the same time on a Mac?
The usual trick uses QuickTime Player. Choose File > New Movie Recording, then View > Float on Top so the camera window stays in front, and press Shift-Command-5 to record the screen with that window in view. Your face becomes part of the screen recording.
What app can I use to record videos on my Mac?
Photo Booth and QuickTime Player come with your Mac and record from the built-in camera. The Screenshot toolbar, opened with Shift-Command-5, records the screen. For a scripted video you post every week, CreateSocial runs in Chrome or Edge on a Mac and adds a teleprompter by the camera and recording in sections.
What is the shortcut for screen recording on a Mac?
Shift-Command-5 opens the Screenshot toolbar with the recording options. In QuickTime Player, Control-Command-N starts a new screen recording. Press Command-Control-Esc to stop.
Can I use Photo Booth on my Mac to record video?
Yes. Click the Video button at the bottom left, then the Record Video button, and click Stop when you finish. Edit > Trim Movie cuts the ends, and File > Export saves the clip as a MOV file.
How do I use my iPhone as a webcam on a Mac?
Turn on Continuity Camera on the iPhone under Settings, General, AirPlay and Continuity. Mount it near the Mac with the rear camera facing you, then pick it from the camera menu in QuickTime, Photo Booth or another app. It needs an iPhone XR or later on iOS 16, and macOS Ventura 13 or later.